ESP32 is run with at command using serial communication (UART)
目次
AT Command Mode Overview
Espressif Systems' WI-Fi/Bluetooth combo module, ESP-WROOM-32, is inexpensive and has been released to the public, making it popular around the world.
ESP-IDF of the official SDK can be custom firmware as you like, but it is not able to be handled without knowledge of FreeRTOS and the hurdle is high.
It can be easily controlled by using the AT command mode in which the host microcomputer (MCU)-ESP32 is connected by UART and operated by AT command in serial communication.
*AT command... A method of communicating using commands configured with strings (ASCII) in the form of AT+xxx.
In addition, in the case of products that control Wi-Fi and Bluetooth modules in the same configuration, there is an advantage that it is able to replace without changing the basic configuration and aim at cost reduction.
However, AT command mode is limited in the functions that can be used because it is easy to handle.
If you want to demonstrate full performance, it is still necessary to develop on FreeRTOS firmly with ESP-IDF.
Firmware for AT command mode is published.
Since the source code is also released on GitHub, it is possible to customize this and add any command to the AT command, but this time we will explain how to simply write the firmware to set it to AT command mode and communicate to do.
https://github.com/espressif/esp32-at
Although the process is simple, there are pitfalls in small places, so I will explain that part in detail.
- Download AT command mode firmware.
- Write with flash write tool.
- Send AT command in serial communication to verify operation.
AT command mode firmware download
First, let's download the firmware for the AT command.
Download the latest version of ESP32-WROOM-32 AT command Bin from the following pages:
https://www.espressif.com/en/support/download/at

Once deployed, store it in a location that does not contain 2-byte characters or spaces in the path, such as just below drive C.
※ Flash tool can not start if there are 2-bytes characters or white space in the path, it is not possible to write well.
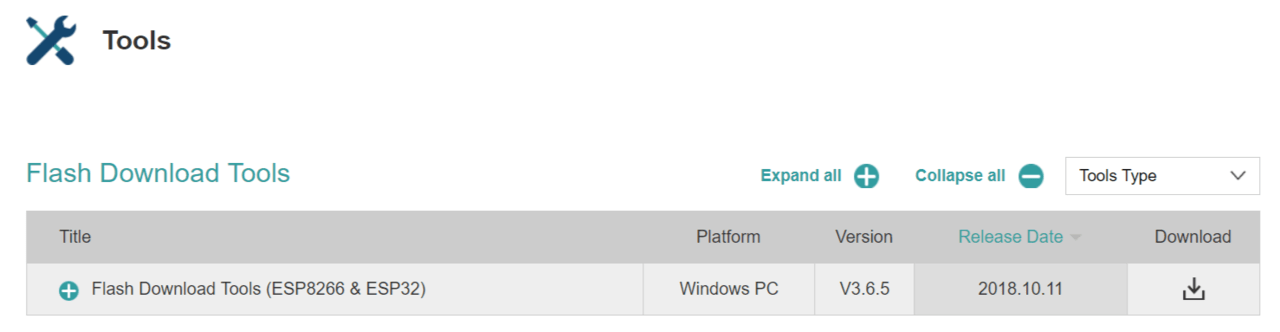
Download flash tools
Download the flash tool from Flash Download Tools (ESP8266 & ESP32) on the following pages:
https://www.espressif.com/en/support/download/other-tools
Once you have expanded this, store it in a location where there are no 2-byte characters or spaces in the path.
Firmware writing with flash tool
Let's write the firmware.
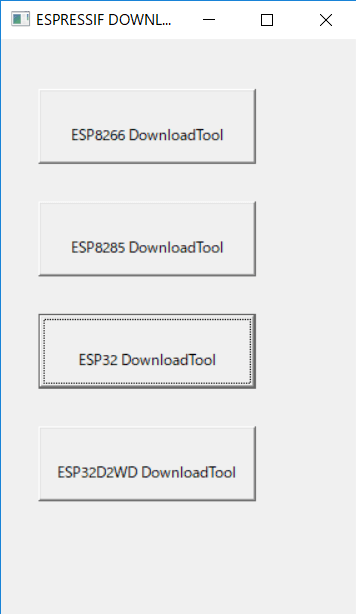
Start ESPFlashDownloadTool_vx.x.x.exe in the Flash Tools folder and press the ESP32 DownloadTool button.
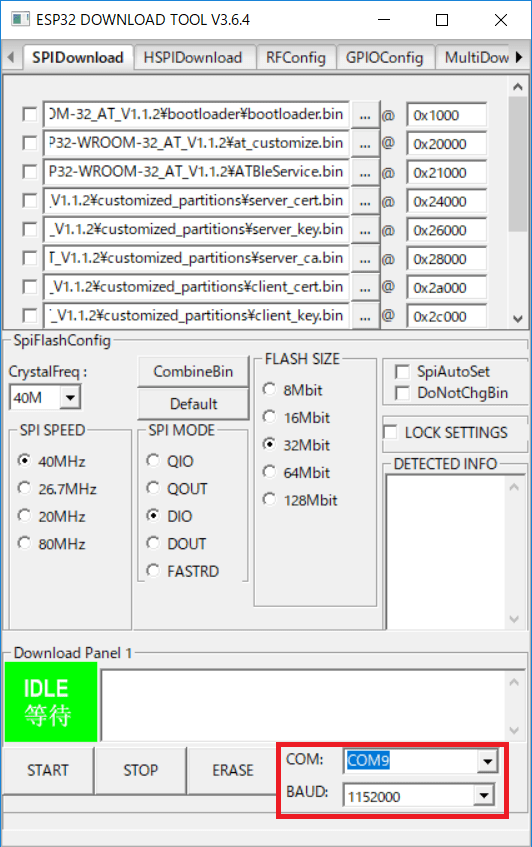
Communication settings
Change the COM port and communication speed settings.
If you are connected by USB, the communication speed is OK at the maximum 1152000bps.
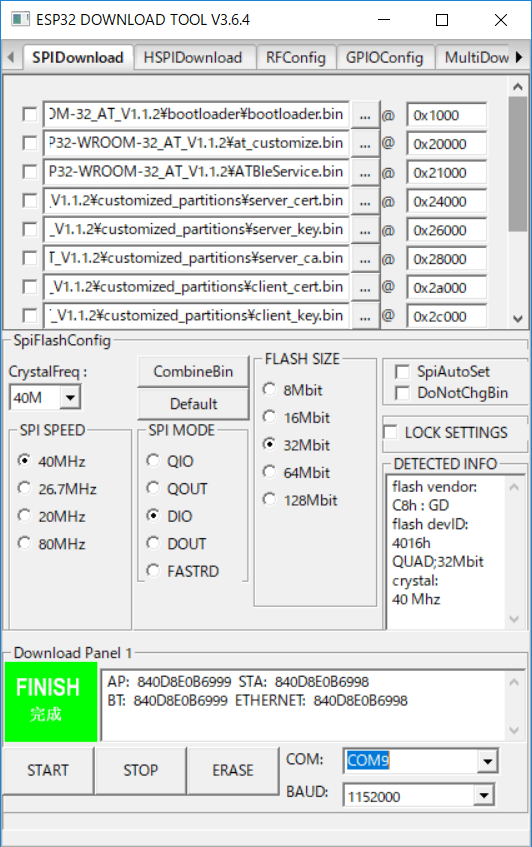
When you press the START button, the green part changes to IDLE ->SYNC->FINISH.
If it does not become FINISH, let's check the settings such as CrystalFreq and FLASH SIZE.
Writing a .bin file
This tool writes the .bin file.
There is a .bin in the stored ESP32-WROOM-32 AT Bin folder.
There are several .bin files, and the write address and file name are specified in download.config, so you can set them with the flash tool.
--flash_mode dio
--flash_freq 40m
--flash_size detect
0x1000 bootloader/bootloader.bin
0x20000 at_customize.bin
0x21000 customized_partitions/ble_data.bin
0x24000 customized_partitions/server_cert.bin
0x26000 customized_partitions/server_key.bin
0x28000 customized_partitions/server_ca.bin
0x2a000 customized_partitions/client_cert.bin
0x2c000 customized_partitions/client_key.bin
0x2e000 customized_partitions/client_ca.bin
0xf000 phy_init_data.bin
0x100000 esp-at.bin
0x8000 partitions_at.bin
If the leftmost check box is not checked, you won't be able to write it, so don't forget it.
Reading can be done from the "..." button, but the address is hand-made.
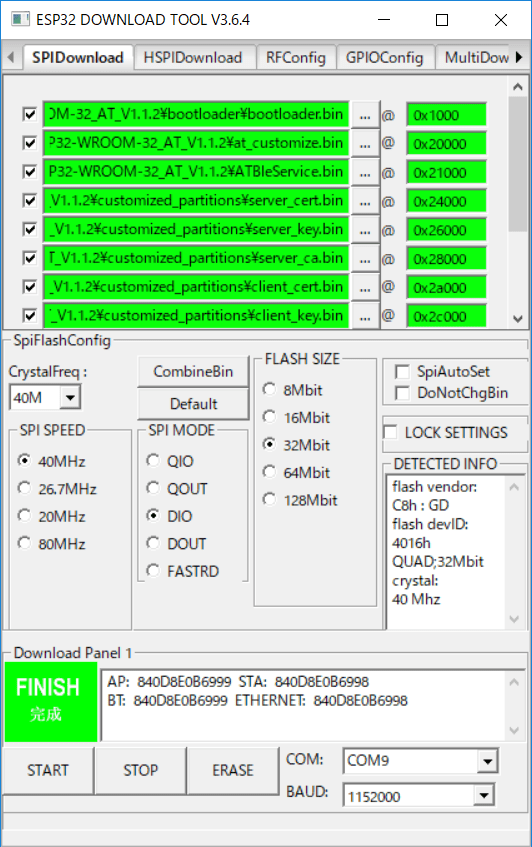
After completing the settings, press the START button to start writing.
I think there are not enough files for the flash tool because there are many files, so let's write it twice.
When you connect with a terminal software such as Tera Term, debug output is displayed.
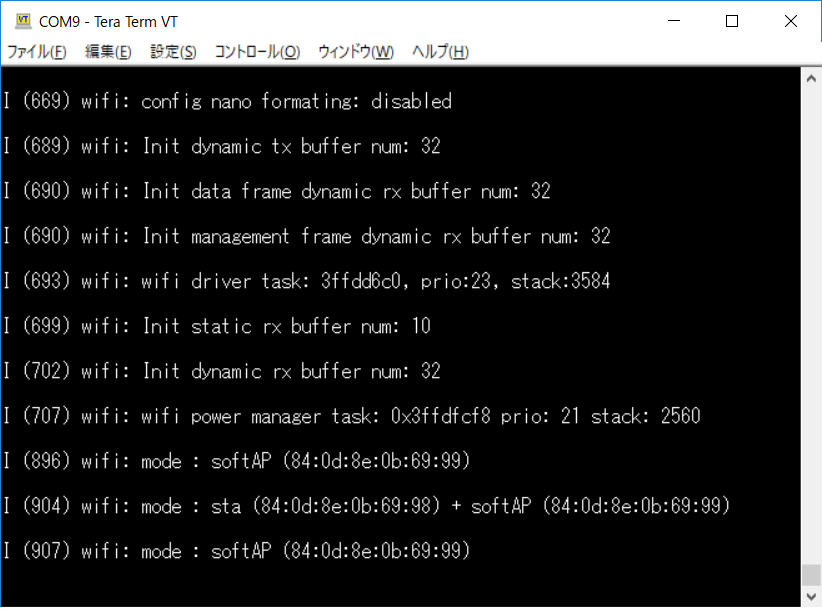
If you see an error in the debug output startup log, you probably haven't written your .bin successfully.
Depending on the content of the error, the area of the software that was originally written may have affected it. In such a case, please write once after erasing.
AT command operation confirmation
Once you've written, send the AT command to see if you get a reply.
The flash write and debug output ports are the same UART pin, but the AT command send and receive ports are different.
According to the official, UART1 is the default.
GPIO16 and GPIO17 are the default send / receive pins, so let's connect a serial port for AT commands here.
The ESP32 Board sends AT commands through UART1 by default.
GPIO16 is RXD
GPIO17 is TXD
GPIO14 is RTS
GPIO15 is CTS
https://github.com/espressif/esp32-at
The port for AT command can be changed.
https://github.com/espressif/esp-at/blob/master/docs/How_To_Set_AT_Port_Pin.md
A list of AT commands is below.
ESP AT Commands Set - Official -
When you check the AT command, send an AT and make sure that you receive it as OK.
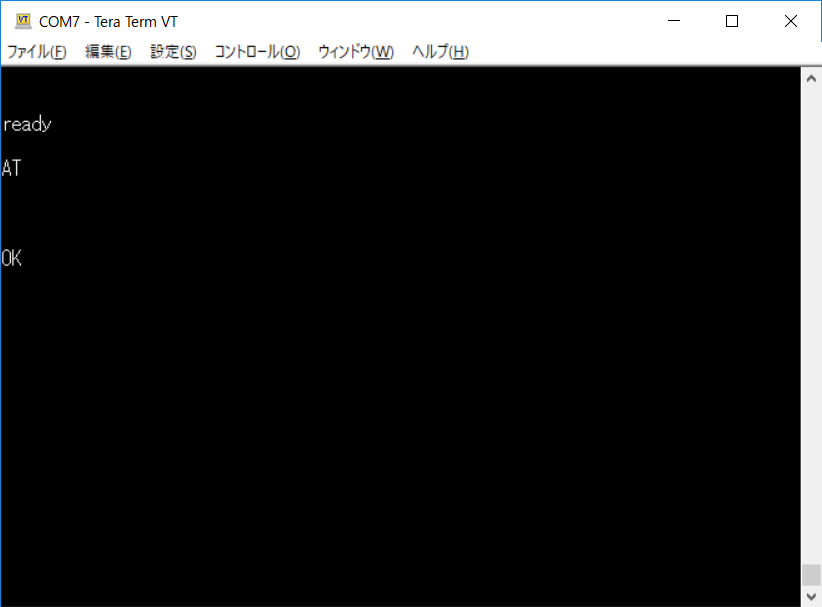
Note:
The AT command is enabled by sending cr+LF line breaks.
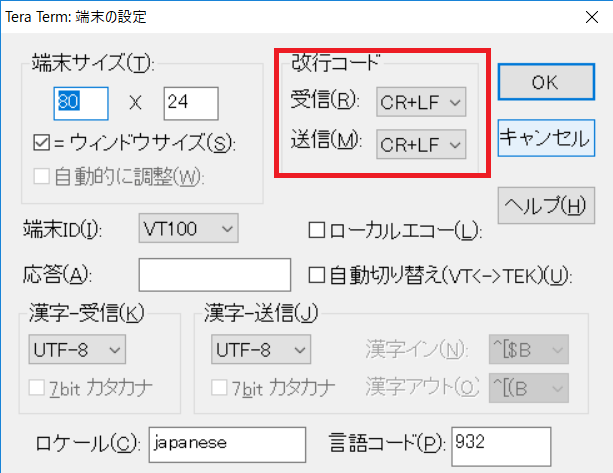
Depending on the terminal software, the transmission when you press Enter may be CR only by default, so let's check.
Tera Term was only CR.
If you want to set the line break code in Tera Term, you can change the line feed code on the menu bar settings -> terminal.
You are now ready to control it with the AT command.
Let's play variously while looking at the command list!